retrointerfacing
  • DIY
    • Arduino
    • fablab
    • fabrication
    • blinky
    • home improvement
    • imaging
    • Processing
    • rapid prototyping
    • recycling
    • repair
  • design
  • robotics
  • retrointerfaces
  • creative technology
  • expo
  • music
  • Home
  • / fablab /
  • fabrication
  • /
  • Repstrap using HP840c’s

Repstrap using HP840c’s

August 22, 2010fablab, fabricationreprap, repstrap

With the StarLC10 matrix repstrap ending up as pizza plotter, a start has been made building a new 3D machine using only the parts of 3 HP deskjet 840c printers.

r0013937

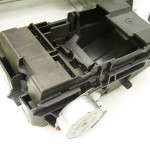
The printers contain many useful parts, the casing is made almost entirely out of ABS (printing material, hurray!)

r0013939

Especially the sliders come in nice, rectangular frame’s which make mounting them easy. For the first tests a frame has been assembled using standard aluminum X-beams (boikon).

r0013962

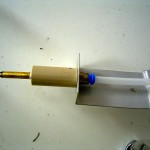
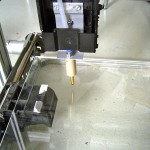
Using the cleaner bin (which normally brushes and seals the cartridge) a Z-axis has been made which has at least 8cm of travel:

r0013947 r0013958 r0013959

Arduino-based control of a DC motor using incremental encoder and PID is not much more difficult than controlling a stepper motor. See the wiki for full documentation.

[sourcecode language=”c”]
void setup(){
int oldposition;
Serial.begin(9600);
attachInterrupt(0, encoder, RISING);
pinMode(10,OUTPUT);
pinMode(12,OUTPUT);
setMotor(-150);
delay(50);
while(position!=oldposition) {
oldposition=position;
delay(50);
}
setMotor(0);
position=0;
}
void loop(){
if(millis()>time+1)
{
float setpoint = 1000+400*sin(n/200)+200*sin(n/50); // 1890 positions
float error = setpoint – position;
setMotor((int)(limit((Kp*error + Kd*(error-oldError) + limit((Ki*sumError),antiWindup)),255)));
oldError = error;
sumError+=error;
n++;
time=millis();
}
}
void encoder() {// encoder service routine
if (digitalRead(4)>0) position++;
else position–;
}
void setMotor(int value){ // set PWM of motor, value may range from -255 to 255
if (value>=0) {
digitalWrite(12,LOW);
analogWrite(10,value);
}
if (value<0) {
digitalWrite(12,HIGH);
analogWrite(10,value);
}
}
[/sourcecode]

next up: including the extruder head, interfacing, making connections, shredding abs, making a scrap-2-3mm-wire extruder system, etc.. etc…

Comments

chintan October 25, 2015 at 5:10 pm - Reply

need code and schematic ! please

    admin May 10, 2016 at 11:26 am - Reply

    difficult.. no good build yet. You can start with http://wiki.edwindertien.nl/doku.php?id=projects:printerprinter and perhaps http://wiki.edwindertien.nl/doku.php?id=installations:pizzaplotter ?

Write a Reply or Comment Cancel reply

Your email address will not be published. Required fields are marked *

This site uses Akismet to reduce spam. Learn how your comment data is processed.

Archives

  • November 2017
  • July 2016
  • June 2016
  • July 2015
  • August 2014
  • March 2013
  • December 2012
  • September 2012
  • August 2012
  • June 2012
  • May 2012
  • February 2012
  • January 2012
  • October 2011
  • September 2011
  • May 2011
  • March 2011
  • February 2011
  • October 2010
  • September 2010
  • August 2010
  • June 2010
  • May 2010
  • April 2010
  • March 2010
  • February 2010
  • January 2010
  • September 2009
  • August 2009
  • June 2009
  • May 2009
  • April 2009
  • March 2009
  • February 2009
  • December 2008
  • November 2008
  • October 2008
  • September 2008
  • August 2008
  • July 2008
  • November 2005

Calendar

March 2023
M T W T F S S
« Nov    
 12345
6789101112
13141516171819
20212223242526
2728293031  

Categories

  • Arduino
  • blinky
  • Creative Technology
  • design
  • DIY
  • expo
  • fablab
  • fabrication
  • home improvement
  • imaging
  • music
  • Processing
  • rapid prototyping
  • Raspberry Pi
  • recycling
  • repair
  • retrointerfaces
  • Robotics
  • Uncategorized

Copyright retrointerfacing 2023 | Theme by Theme in Progress | Proudly powered by WordPress