FlatpackWalker

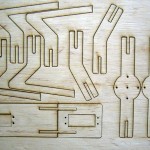
This is a try-out of a FabLab-ready kit design for a 2-Servo walking robot. The design is inspired by the lynxmotion kits and the designs by david buckley. The goal for this project is to make all mechanical parts for the servo walker out of 1 A4 size sheet of plywood (or perspex, lexan, delrin, whatever).
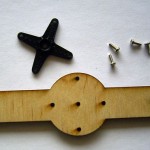
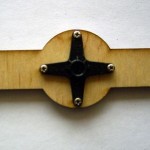
Two RC servo’s are mounted in the appropriate holes, Battery space is left in the center of the body. Control will be done by the ottantotto (a simple Arduino style board which I designed)
I started out with a cardboard prototype (not functional at this time, just to check all sizes):

After this I decided to make a protoype out of acrylic plate:


The simple 2-servo walker (which I hope to use as a fablab-ready robot kit) went through its first paces today. The microcontrollerboard used is an ATmega32.
The robot walks well, now it’s time to make it turn, avoid obstacles, sit up, make noise, etc… You can see it walk on Youtube
If you want to build your own: see the previous post on construction details. You have to get some parts, such as two RC servo’s, 4 AA batteries, battery container, microcontroller board, etc..

Then you have to make the mechanics. Here is a pdf which you need to cut or saw out of a sheet of polycarbonate, perspex, plywood .. walker
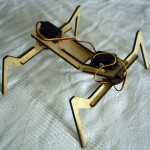
At the protospace fablab I made a laser-cut wood version of the simpleWalker. It took only 5 minutes on the laser cutter, instead of an hour behind the bandsaw! I used 4mm birch plywood.
The robot works well (and smells like a campfire … oh well…)


Again, it can be seen walking on YouTube (but with a lot more noise than the silent rubber feet used in previous versions)
In the first version of the simple walker I used a custom atmega32 based board. I replaced it by a ‘custom’ version of the Arduino which I dubbed ‘ottantotto’.
The microcontrollerboard is a breadboard version of the ‘ottantotto’ controller. It uses an ATmega88 instead of ATmega168 or ATmega328
In some cases power draw on the 5V supply by the RC servo’s can cause the Microcontroller to ‘freeze’. The 100uF capacitor I originally mounted is probably to small.. Adding an external 1000uF cap seems to solve the problems.


In the meantime I also made an Arduino sketch instead of the WinAVR gcc sources.. It is pretty simple:
|
1 2 3 4 5 6 7 8 9 10 11 12 13 14 |
#include <Servo.h> Servo frontservo,backservo; char forward[] = {60,100,100,100,100,60,60,60}; void setup(){ frontservo.attach(9); backservo.attach(10); } void loop(){ for(int n=0;n<4;n++){ frontservo.write(forward[2*n]); backservo.write(forward[(2*n)+1]); delay(300); } } |
on breadboard a simple programming dongle has been made (using a max232) which can be used in combination with an usb-serial adapter cable (or a plain RS232 cable) to program the board. It is fully Arduino compatible. Schematics can be found on the ottantotto wiki page.
This project has also been posted as an instructable


Comments